🔍 Project Summary
This project simulates a basic SOC lab using Active Directory and Splunk. It involves deploying three VMs (DC1, Client1, and SplunkServer) and configuring AD, domain join, GPOs, and log forwarding via Splunk Universal Forwarder.
📊 Lab Architecture

📸 Screenshots
Figure 1: VirtualBox Configuration for DC1
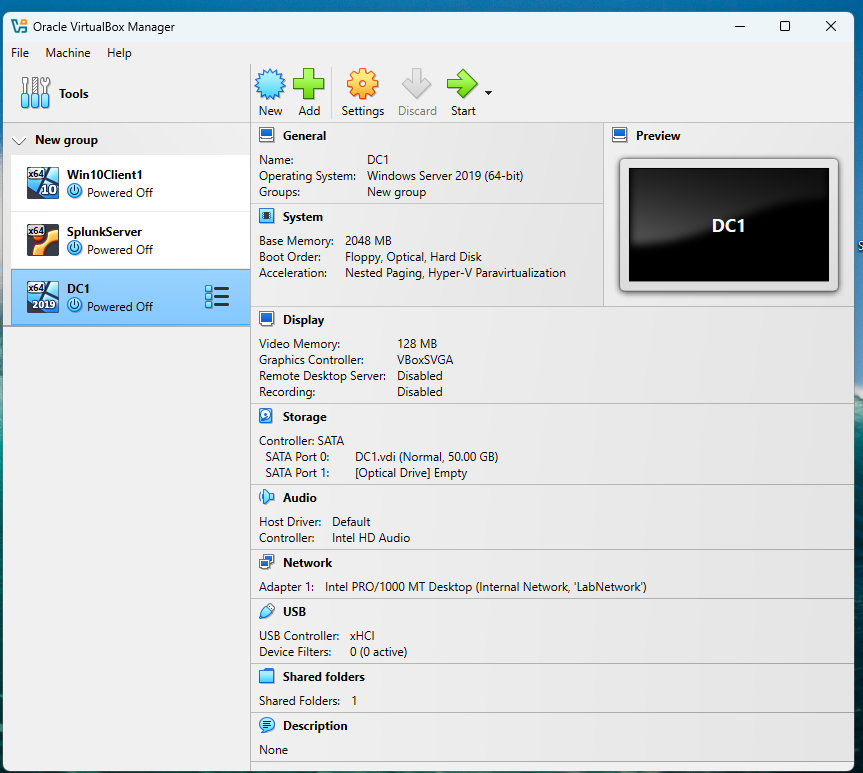
VirtualBox configuration for DC1, showing 2 GB RAM and Internal Network (LabNetwork). This setup ensures DC1 can communicate with other VMs in the lab network.
Figure 2: VirtualBox Configuration for Client1
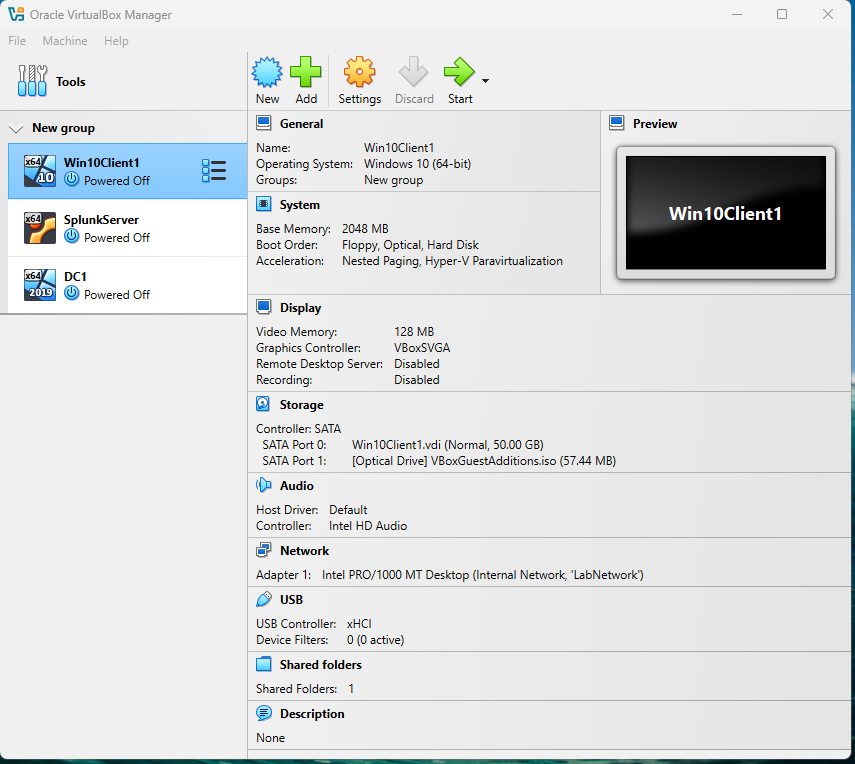
VirtualBox configuration for Client1, showing 2 GB RAM and Internal Network (LabNetwork). Client1 is configured to join the soclab.local domain.
Figure 3: VirtualBox Configuration for SplunkServer
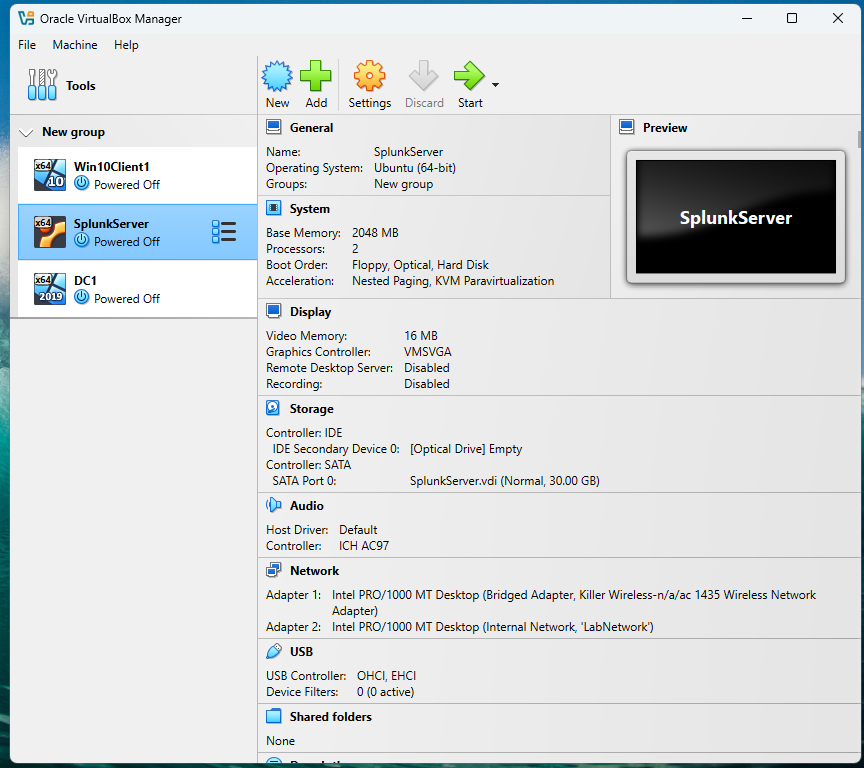
VirtualBox configuration for SplunkServer, showing Bridged Adapter and Internal Network (LabNetwork). The Bridged Adapter allows external access to the Splunk web interface.
Figure 4: Installing Active Directory Domain Services (AD DS) on DC1
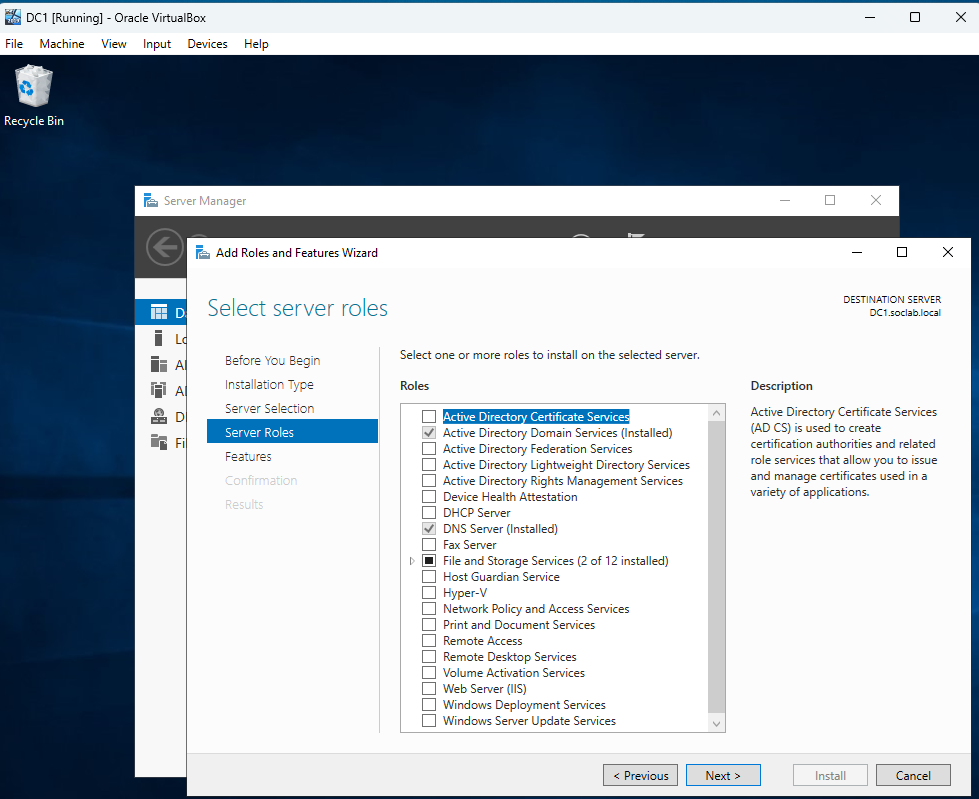
Installing Active Directory Domain Services (AD DS) on DC1 using the Add Roles and Features Wizard. This is the first step in promoting DC1 to a domain controller.
Figure 5: DNS Forward Lookup Zone on DC1
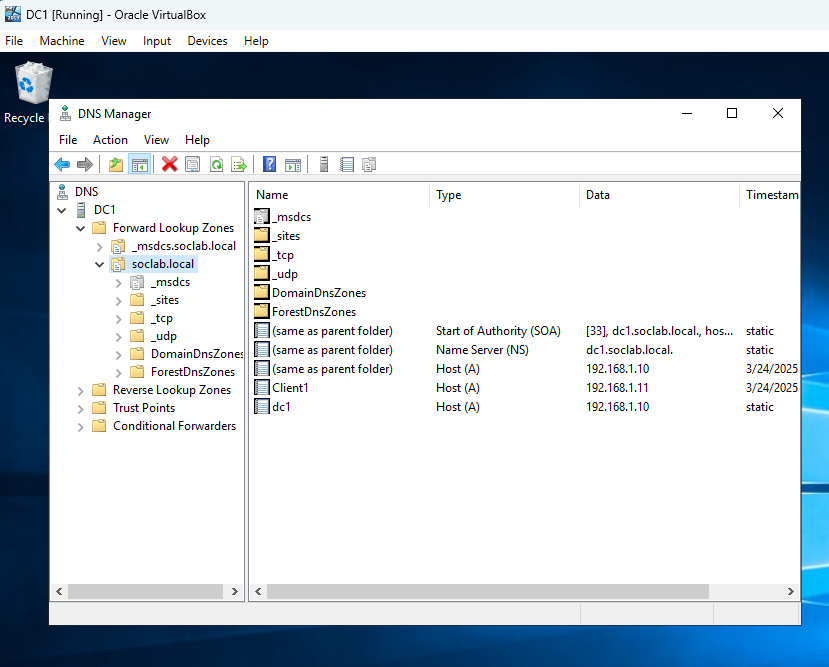
DNS forward lookup zone for soclab.local on DC1, showing records for dc1 and client1. This ensures proper name resolution within the domain.
Figure 6: DNS Reverse Lookup Zone on DC1
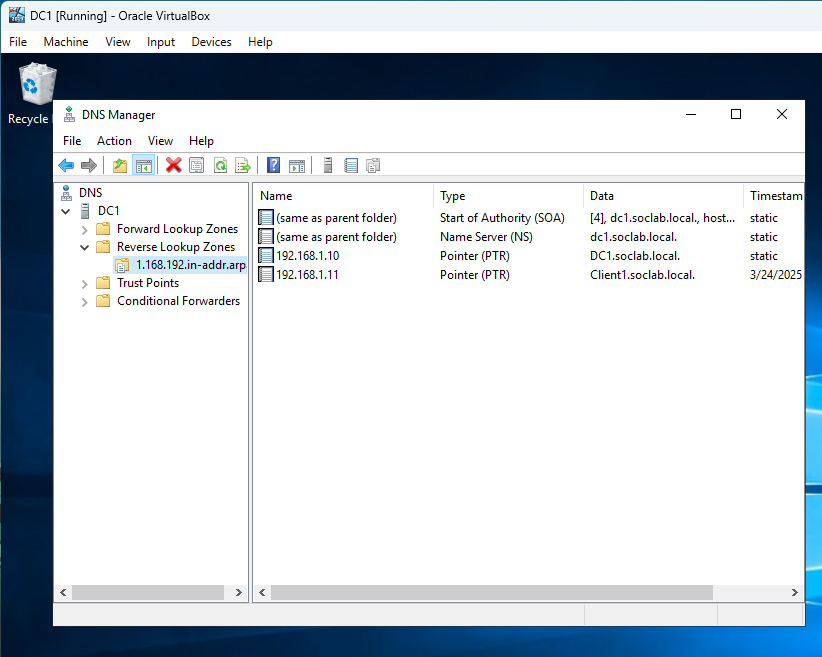
DNS reverse lookup zone for 192.168.1.0/24 on DC1, showing PTR records for dc1 and client1. This enables reverse DNS lookups for IP addresses in the lab network.
Figure 7: User Creation in ADUC on DC1
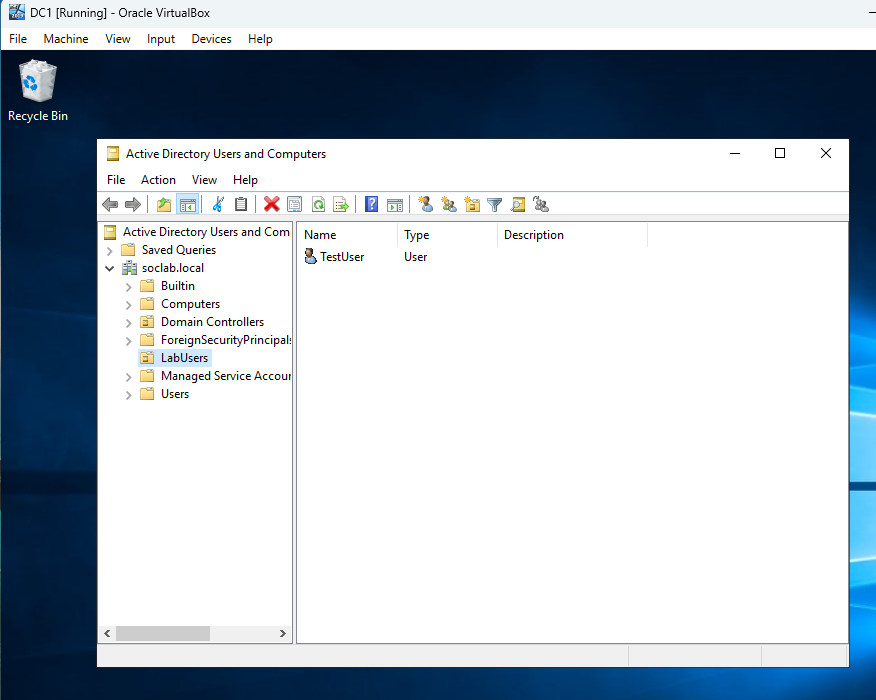
User TestUser created in Active Directory Users and Computers (ADUC) on DC1 under the soclab.local domain. This user will be used for testing domain functionality.
Figure 8: Client1 Joined to the Domain
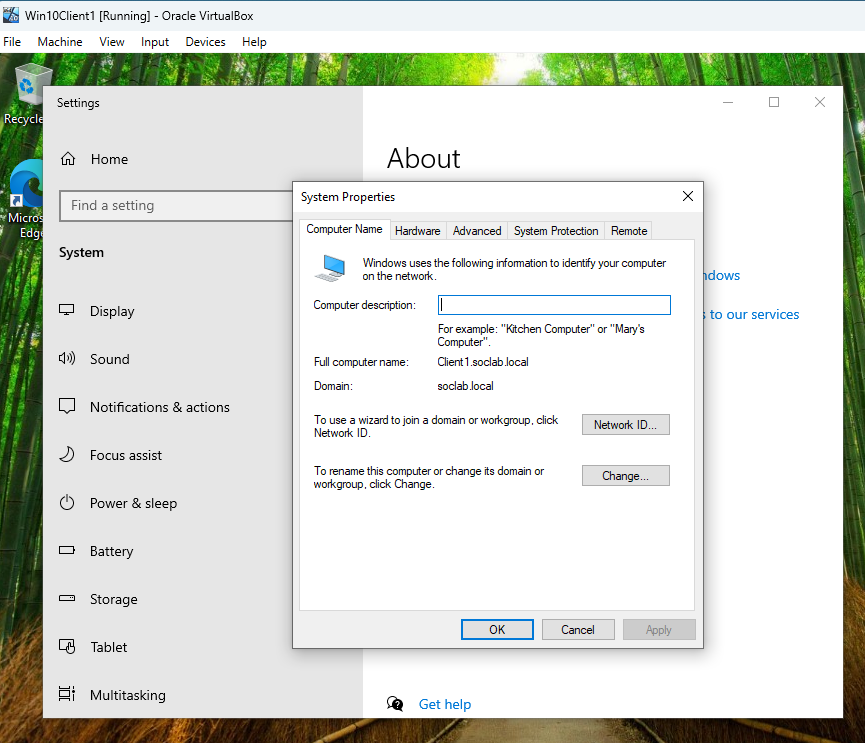
Client1 joined to the soclab.local domain, as shown in System Properties. This confirms that Client1 is now part of the AD domain.
Figure 9: Applying GPOs on Client1
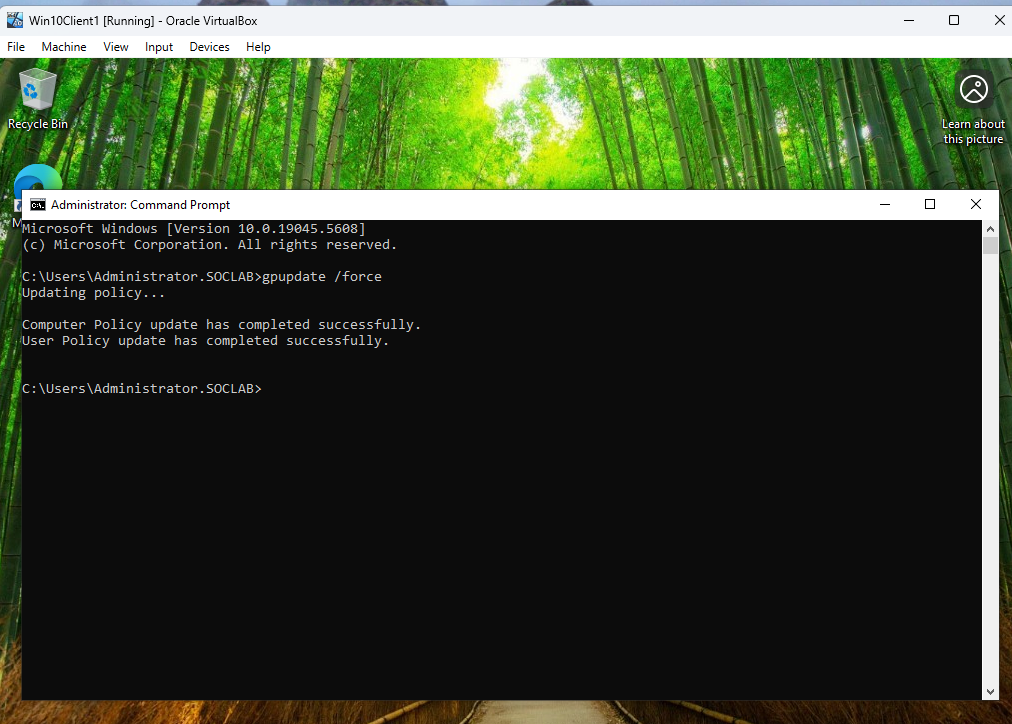
Applying Group Policy Objects (GPOs) on Client1 using the gpupdate /force command. This ensures that domain policies are applied to the client.
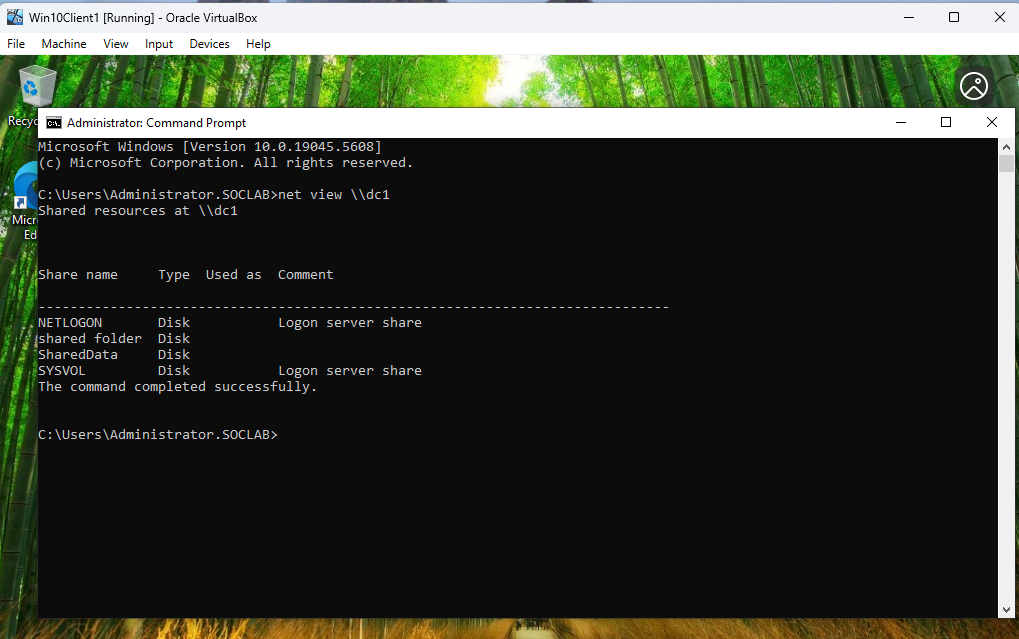
Figure 10: Accessing Shared Folders from Client1
Client1 accessing shared folders on DC1 using the net view \\dc1 command, showing the SharedData folder. This verifies network connectivity and share visibility.
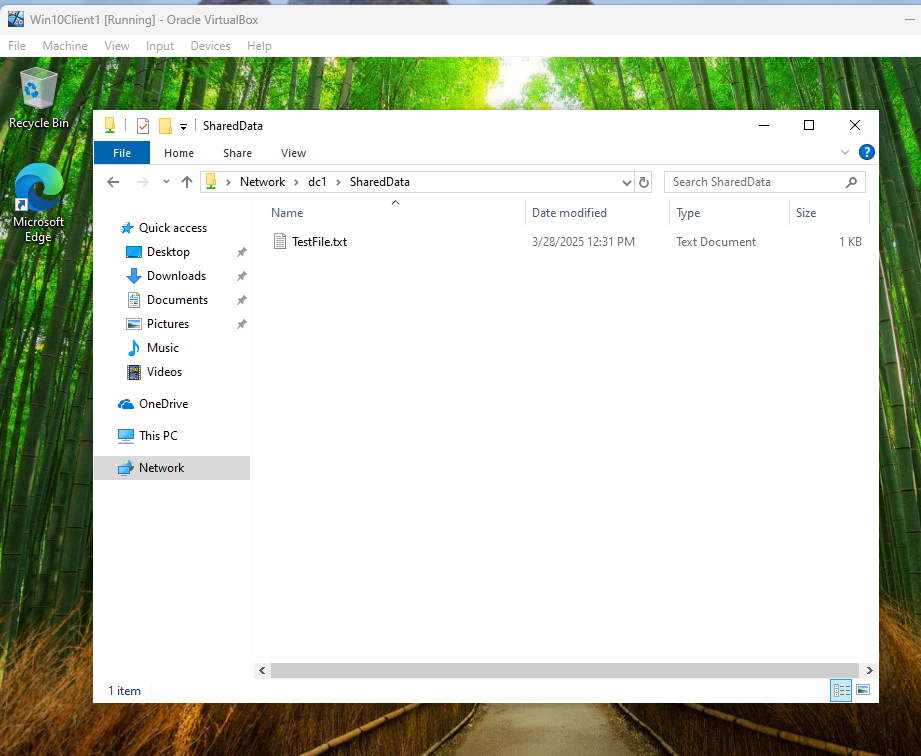
Figure 11: Verifying Shared Folder Access from Client1
Client1 accessing the SharedData folder on DC1, showing the TestFile.txt file. This confirms that the shared folder is accessible and functional.
Figure 12: Configuring inputs.conf on DC1
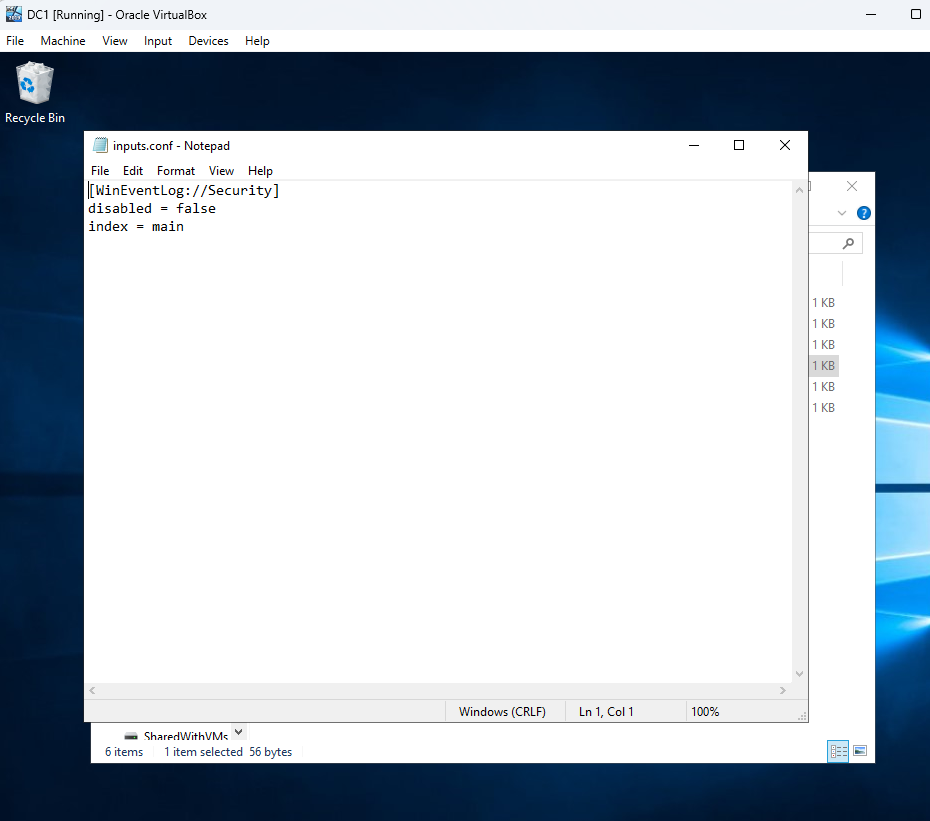
Configuring inputs.conf on DC1 to monitor Windows Security logs for Splunk Universal Forwarder. This enables log forwarding to SplunkServer.
Figure 13: Configuring inputs.conf on Client1
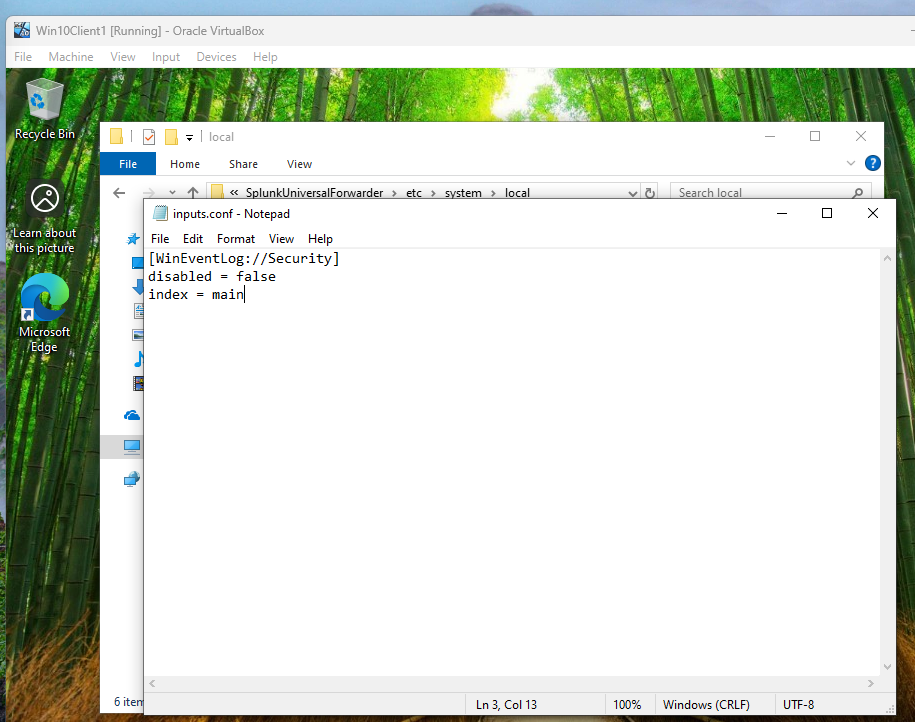
Configuring inputs.conf on Client1 to monitor Windows Security logs for Splunk Universal Forwarder. This ensures Client1’s logs are sent to SplunkServer.
Figure 14: Configuring SplunkServer to Receive Logs

Configuring Splunk on SplunkServer to receive logs from DC1 and Client1 on port 9997. This sets up the Splunk instance to collect forwarded logs.
Figure 15: Disk Space Usage on SplunkServer (Before)
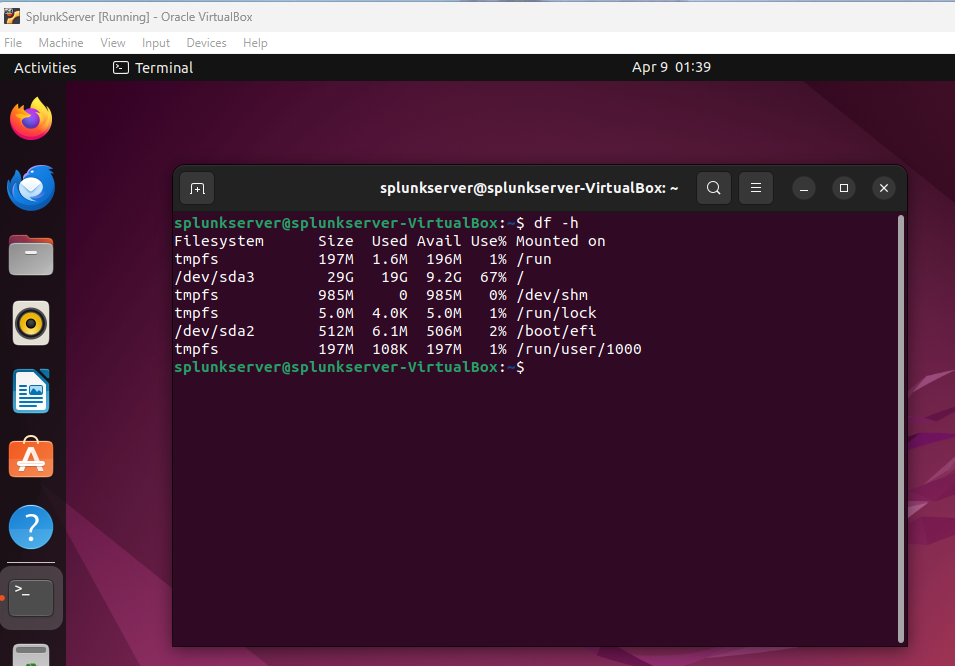
Disk space usage on SplunkServer before simulating a disk space issue, showing /dev/sda3 at 67% usage. This is the baseline disk usage.
Figure 16: Disk Space Usage on SplunkServer (After)
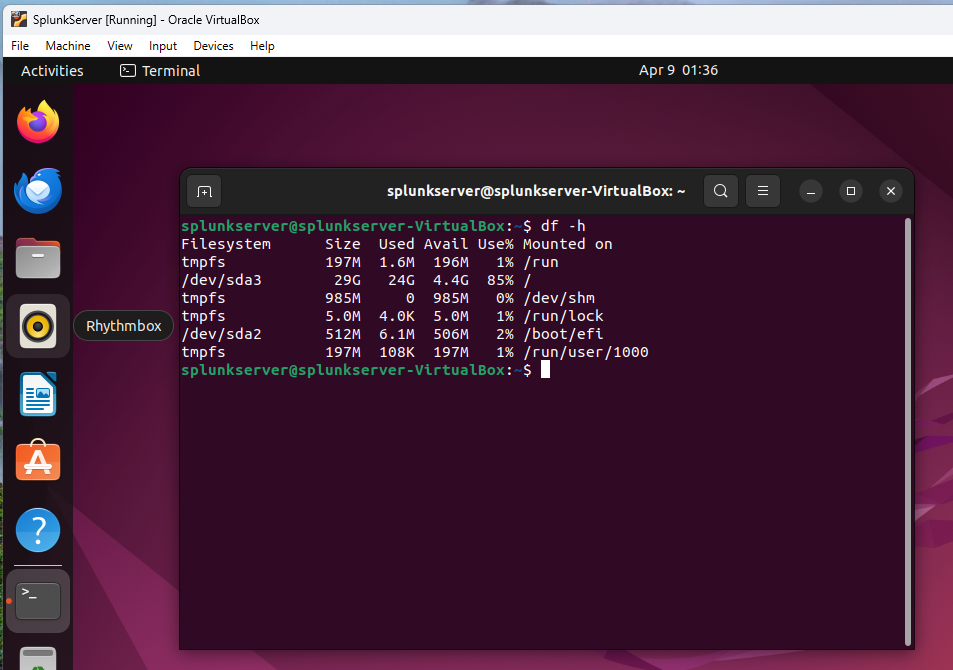
Disk space usage on SplunkServer after simulating a disk space issue, showing /dev/sda3 at 85% usage. This demonstrates a potential disk space concern.
Figure 17: Splunk Search on SplunkServer
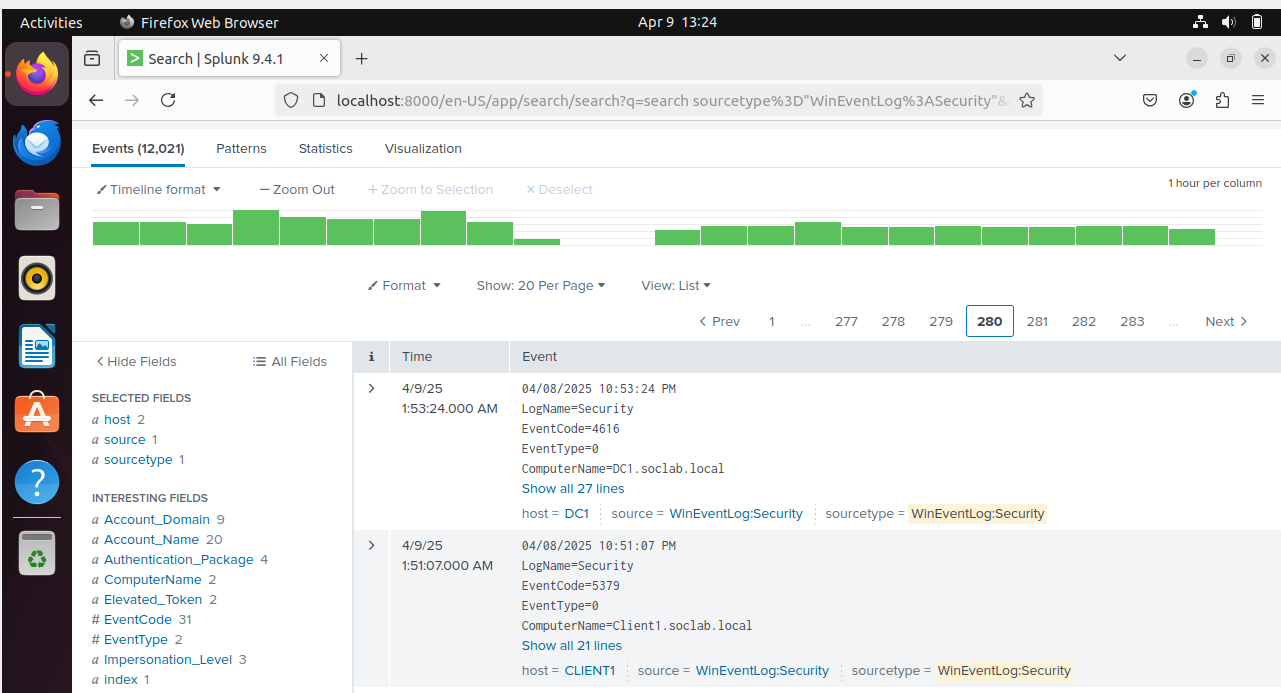
Splunk search on SplunkServer (sourcetype="WinEventLog:Security") showing Security logs from DC1 and Client1. This confirms successful log collection and monitoring.
🧰 Tools & Technologies
- Windows Server 2019
- Windows 10
- Ubuntu Server 22.04
- Splunk Enterprise + Universal Forwarder
- Active Directory, GPO, DNS, SMB